Creating and managing an email
In the Email section, you can design, create, and manage the messages you want to send.

Before you begin
- The platform allows you to create the email you want to send using a drag&drop editor, which allows you to import “blocks”, i.e. types of objects to be included in the email (text boxes, images, buttons…).
- You can create an email from scratch, designing it as you prefer, or use one of the templates that you find already loaded in the Template section.
- An email in Infomail has several states:
- Draft: the email is being worked on, editing activities have not yet been completed and sending has not been scheduled
- Scheduled: ready to be sent
- In progress: being sent
- Sent: sent and monitored through statistics

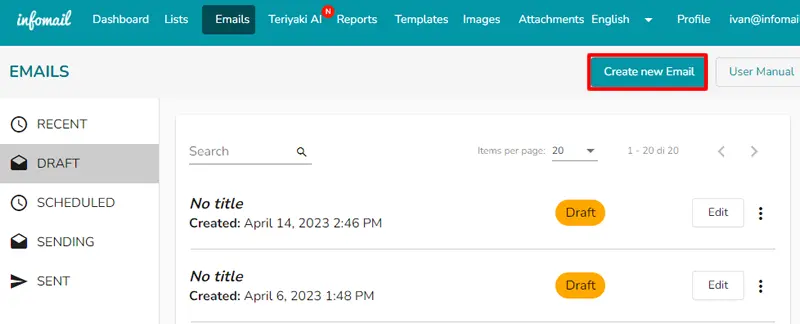
- Click on the Create new email , located in the top right corner.
- Choose a title for the email. The title is an internal name, with which you can identify your email in the general list. The title you enter is not information available to your recipients.
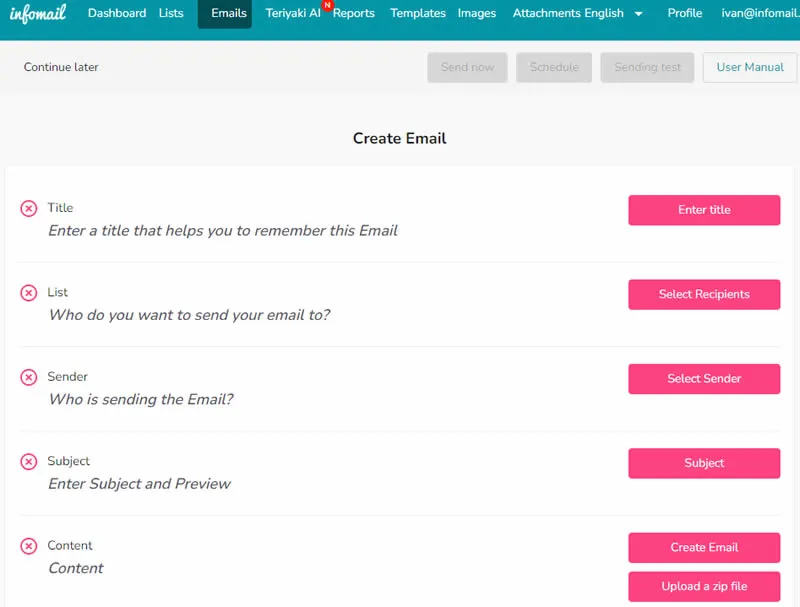
- Once the new email is created, you will access the email design page: through a guided flow, you can:
- set recipients
- define the sender
- choose the email subject and set the preview
- access the drag&drop editor, the tool that actually creates the email to be sent.
- It is sufficient to press the buttons on the right-hand side of the screen to set the necessary elements for the sending. Until all of them have been completed, it will not be possible to send the email.
- The choice of recipients is made by selecting the list of contacts to whom you want to send the message through a dropdown menu.
- The choice of sender is made by selecting one of the enabled senders from a dropdown menu with whom you want to send the message.
- The choice of subject and preview is a fundamental step for the success of your email. Infomail allows you to customize both the subject line and preview, i.e., the part of the message that is displayed by the email client without the recipient being required to open the email. By clicking on the emoji icon on the right , you can choose one or more emojis to insert in the email content.
- The final result will be summarized as follows. By clicking on Edit , you can always update these fields until the send has been made.
- By clicking the Create Email button, you can access the drag and drop editor to create the message to send. The platform provides numerous system Templates, i.e., templates that can be freely used and modified according to your own needs.
- Alternatively, you can use a personalized template generated in the section Template. Inside the system Template list, there is also a blank template, to allow maximum freedom in creating content.
