Create and manage a list
In the Lists section, you can manage all your contacts easily and quickly.
Whether you have manually added individual users, uploaded lists, or have subscribers from the registration form provided by Infomail, you can manage all your contacts within this section.
Before you begin
it is important to note that a list is a set of contacts
with Infomail considering each individual email address uploaded to the list as a contact. You can always customize the structure of your list by adding additional information to the contacts through optional fields such as name, last name, company, and more.
When you registered, Infomail automatically created a Test List associated with your account, where you can insert the email address you used during registration. Use it to test the effectiveness of your communications before sending them to your contact list.
- Test list
A test list is a special list created solely to allow you to perform test sends to predefined addresses. Infomail automatically creates it for you when you register. - The optional fields
are personalized fields that you can add to your list. These optional fields allow you to add more information to each contact, such as personal or business data, which can then be used to personalize the communications you send, both in the email subject and in the message. - TAG
Tags are labels that you can use to categorize the contacts in your list, which can later be filtered. - Segments
are filters that you can set on the tags applied to your list. When sending your communication, Infomail allows you to send it to all recipients in the list or only to those identified by the segment.
IMPORTANT: As stated in the general terms of service, it is the responsibility of the data controller to obtain explicit consent for the processing of personal data from the email addresses uploaded to the platform.
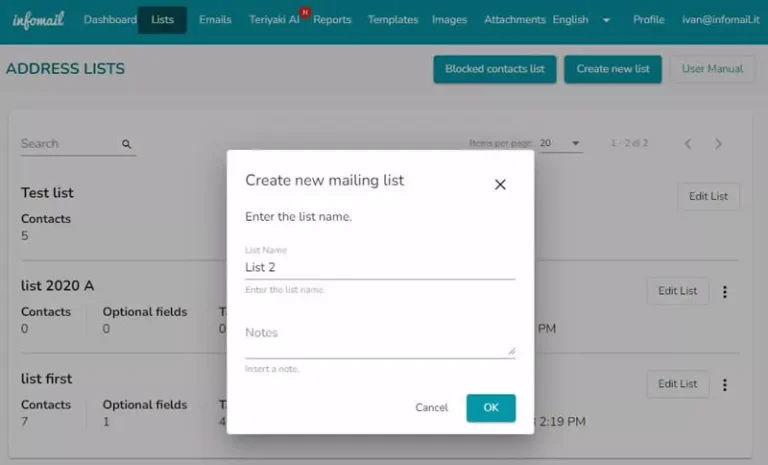
1. Click on the Create New List button in the upper right corner.
2. Choose a name for the list; if you want, you can also add a note to help you better identify the recipients you have entered.

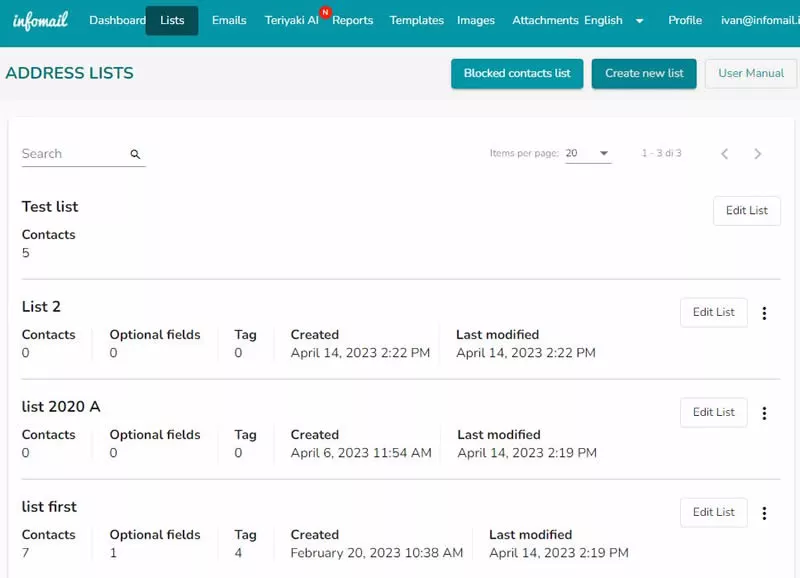
3. Once the list is created, it will appear in the list as you see in the example.

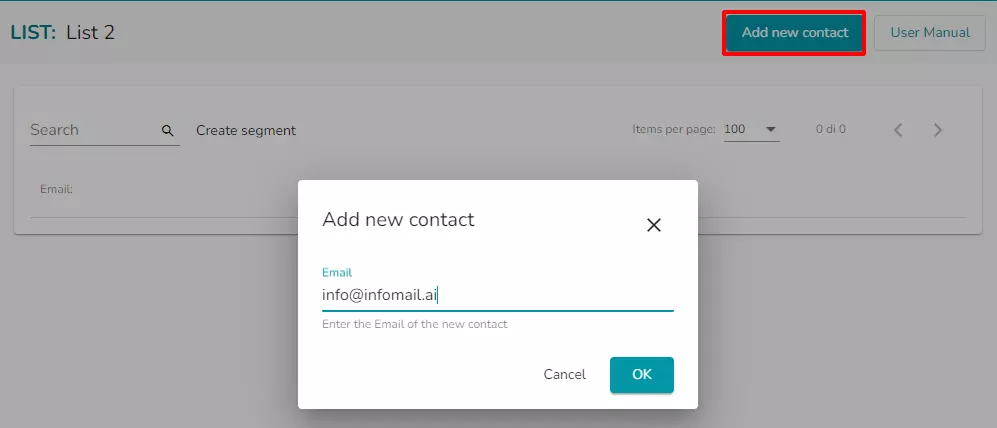
4. Pressing on the Edit List button takes you to the page with the list of contacts in the list.

The page allows you to enter new individual contacts

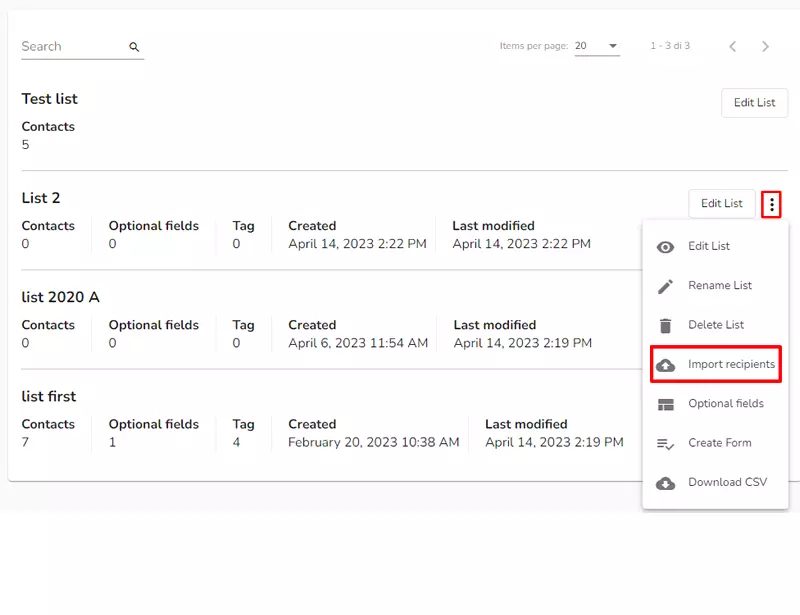
or upload a list of email addresses in a csv file format.

See how Infomail manage bounces and unsubscribed recipient